DLPCI RSLINX Quick Start
This document assumes that the DLPCI Driver and hardware has been installed and
configured as referred to in the DLPCI Hardware Quick Start document.
PDF Download
This quick start is to help you get started with your DLPCI using RSLINX.
1. Check the Com Port that has been set by the driver ( use the one occupied by the card in the Device Manager in your PC as shown below). Will be needed in step 8.

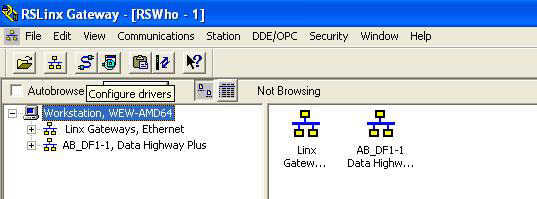
2. Start RSLINX
3. Select Configure Drivers
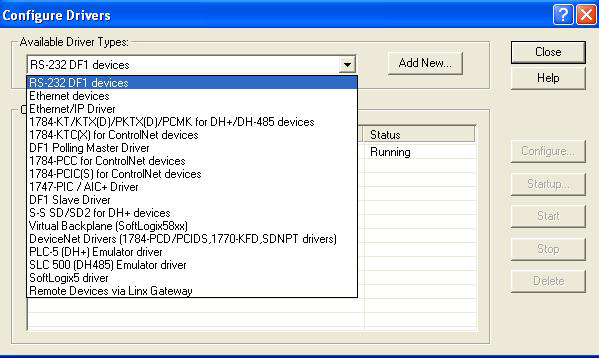
4. Choose RS-232 DF1 Devices from the Available Driver Types
5. Click on Add New
5. Click on Add New
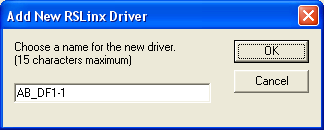
6. Type in a name for the driver or use the default
7. Click OK
8. Select the Comm Port number that has been set by the driver (Use the one you found in step1).
9. Select 1770-KF2 device for the DLPCI-DH+ or
1770-KF3 for the DLPCI-DH-485.
7. Click OK
8. Select the Comm Port number that has been set by the driver (Use the one you found in step1).
9. Select 1770-KF2 device for the DLPCI-DH+ or
1770-KF3 for the DLPCI-DH-485.
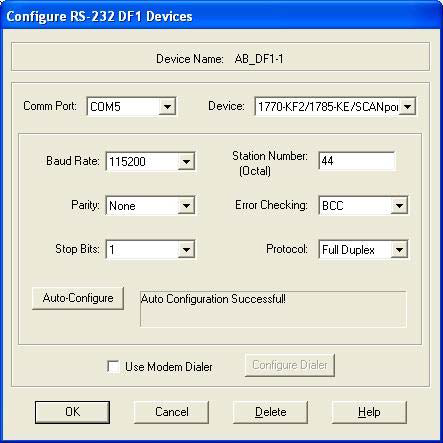
10. Click on Auto-Configure, it should come up with (Auto Configuration
Successful) and settings some thing like what you see above is DH+
11. Click OK.
11. Click OK.
The RSLINX Driver is now configured. Click on RSWHO icon, it should
show all the nodes on your DH+ or DH-485 network as shown below, this
one here is for DH+.
