Quickstart Procedure
DLPCIE (PCIE Bus DH+/DH-485 Interface Cards) Using Switches.
PDF Download
Please ensure that you have the Equustek Configuration CD available when installing the DLPCIE card.
Please see the DLPCIE user’s manual or spec sheet for cable diagrams and more in depth greater descriptions.
Please see the DLPCIE user’s manual or spec sheet for cable diagrams and more in depth greater descriptions.
Step 1 – Install DLPCIE in your PC
1. With the Power Off, insert the DLPCIE card in an available slot of your PCIE bus.
2. Replace cover and power up you PC, the DLPCIE LED’s should go through the following startup sequence :
on for ˝ second, then NETWORK LED on for ˝ second, then BUS LED on for ˝ second.
2. Replace cover and power up you PC, the DLPCIE LED’s should go through the following startup sequence :
on for ˝ second, then NETWORK LED on for ˝ second, then BUS LED on for ˝ second.
Step 2 – Installing the Driver on Power UP
1. New Hardware wizard should automatically detect the DLPCIE card and start-up.
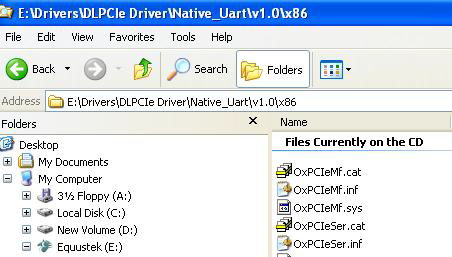
2. Select Have Disk when it is looking for the (Driver) file. Browse the Equustek CD and locate the appropriate file.
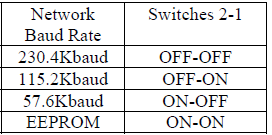
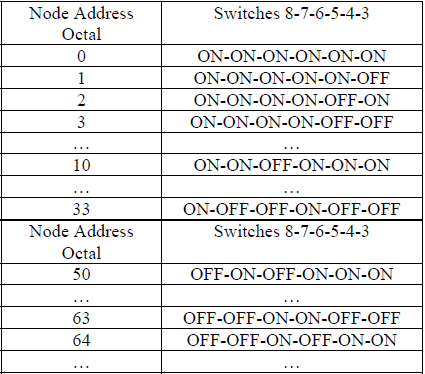
Step 3 – Select The Network Node address and Baud rate settings :
Please not that SW ON= 0 and SW OFF =1
Step 4 – Configuration Settings
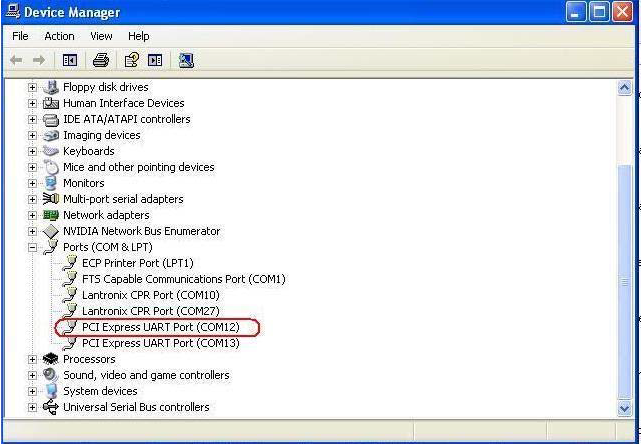
1. Find out what COM port has been assigned to the DLPCIE. To do this, open the Device Manager (from the Control Panel, select System, then on the Hardware tab in the System Properties window, select Device Manager). Under Ports (COM & LPT) you will see the two COM ports assigned to the DLPCIE Use the 1st one, as the second one is the DB9 pin RS232 general purpose serial COM PORT .
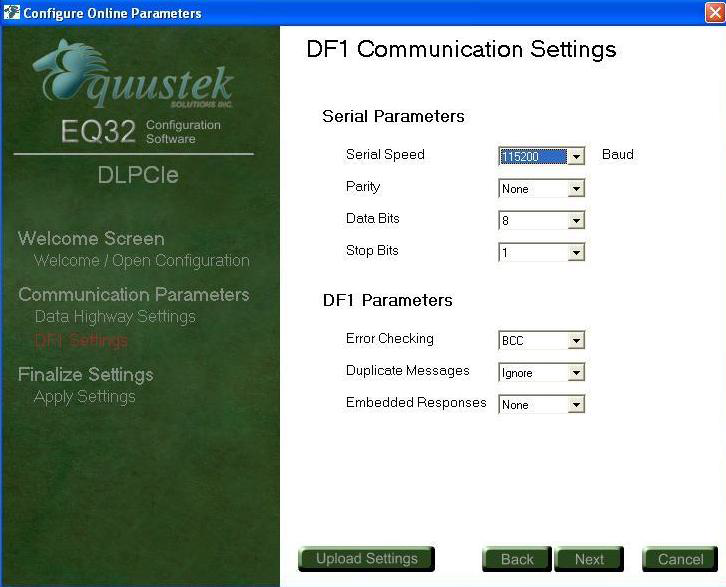
2. The DLPCIe is pre configured to the settings shown.
3. If other than these settings are required then please use EQ32.
4. The DLPCIE is now ready for online operation.