PDF Download
DH+ to DH485 Passthru via SLC504 to Standard Panelview
The following is a typical set-up using DH+ to DH485 Passthru communications via a
SLC504 to a Standard Panelview. The example below assumes the reader has working
understanding of SLC, PC and Panelview operation.
Configuration:
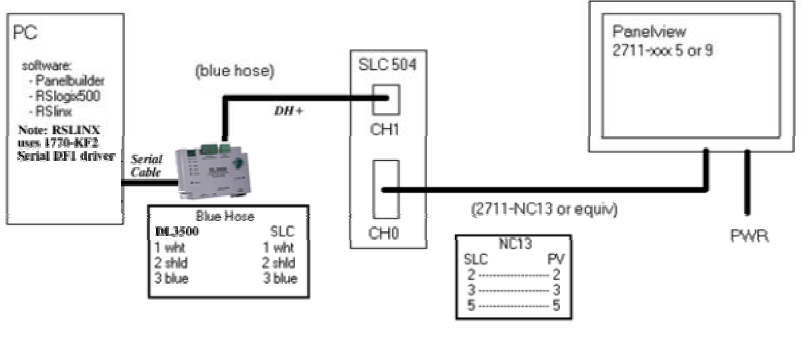
a) DL3500- Node 2 on DH+
b) SLC5/04 – Node 1 on DH+ and DH-485
c) Panelview - Node 2 on DH-485 DH+ - 57.6k baud, Passthru Link ID - 2 DH-485 - 19200 baud, Passthru Link ID 1 SLC5/04 - Status Bits: S:34/0 = 0, S:34/5 = 0 for DH-485 Passthru Enabled
Configuration:
a) DL3500- Node 2 on DH+
b) SLC5/04 – Node 1 on DH+ and DH-485
c) Panelview - Node 2 on DH-485 DH+ - 57.6k baud, Passthru Link ID - 2 DH-485 - 19200 baud, Passthru Link ID 1 SLC5/04 - Status Bits: S:34/0 = 0, S:34/5 = 0 for DH-485 Passthru Enabled
A. Hardware Setup
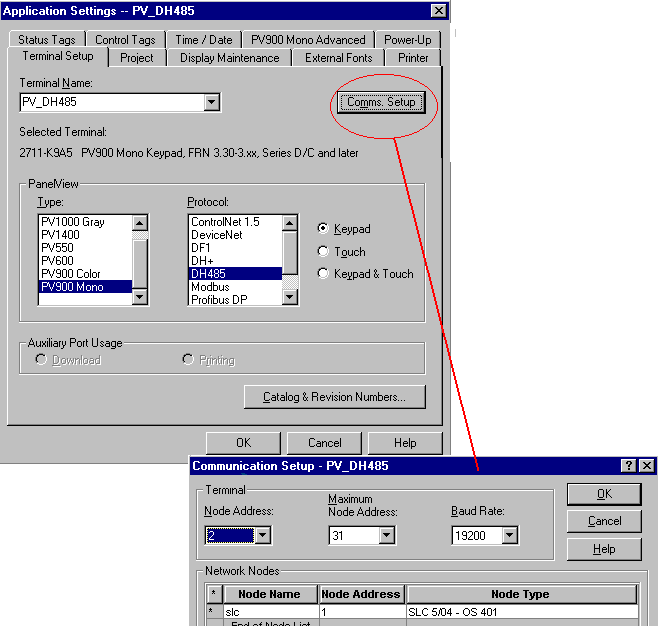
B. Panelview Terminal Setup
- Using Panelbuilder software (2711ND3 ver 3.2 or greater) setup the PV terminal. This is
selected under Application Settings and Terminal Setup. In this example a PV900 DH485
keypad Panelview was used (2711-K9A5).
- Make sure the firmware selection matches Panelview terminal (see "Catalog & Revision
Number" selection)
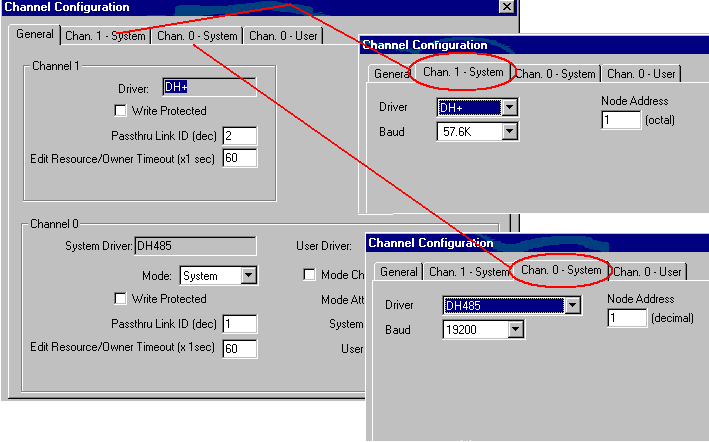
C. RSlogix 500 - SLC504 Channel Configuration
- Setup RSlogix500 for SLC504 using the DF1 serial driver and the DL3500.
- In RSlogix500 under "Processor Status", CH0, make sure that S:34/0 and S:34/5 are both
set to "0". This enables the Passthru bridging mode.
- Setup Channel Configuration as shown below. Note that since we have (2) separate networks, DH+ and DH485, the node addresses can be the same. If there were another device on one of the networks that device would need a unique address for that specific network.
- Once configured, download to SLC and put in "Run" mode.
D. Setting up the DL3500-SLC5/04 Bridge Parameters
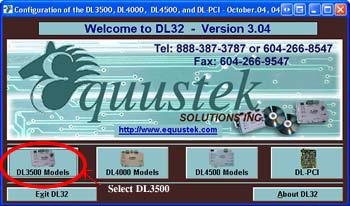
- Install DL32 – V3.04 or later and setup the DL3500 as follows.
- Step 1 – Select DL3500 Model.
- Step 1 – Select DL3500 Model.
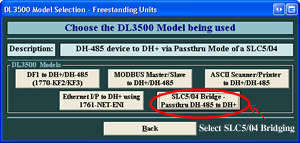
- Step 2 – Select SLC5/04 Bridge – Passthru DH-485 to DH+.
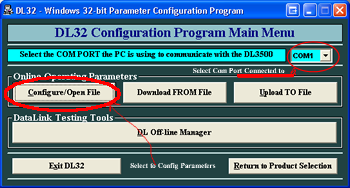
- Step 3 – Select the COM PORT and then Configure/Open File.
- Step 4 – Setup the Operating parameters of the DL3500.
• DH+/DH-485 Device #
• SLC5/04’s node number
• DH+ and DH-485 Link ID’s
• DF1 Protocol Paramters to be used by RSLINX.
• DH+/DH-485 Device #
• SLC5/04’s node number
• DH+ and DH-485 Link ID’s
• DF1 Protocol Paramters to be used by RSLINX.
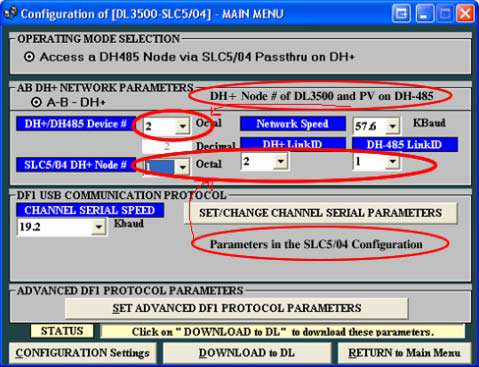
- Step 5 – Click on the Download to DL button and follow the prompts.
Note: The DH+/DH-485 Device # is the address the DL3500 will
occupy on the DH+. It must correspond to the address of the
DH-485 device you wish to communicate across the SLC5/04
Bridge. In this example it is the Panelview at address 2.
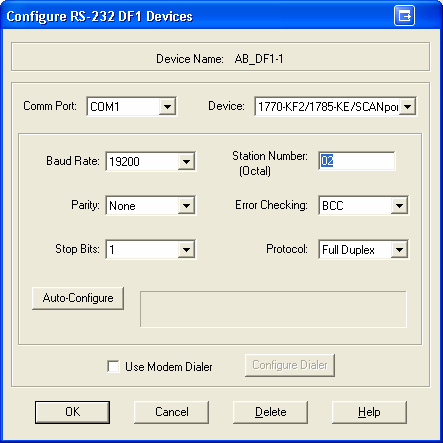
E. RSlinx – 1770-KF2 Serial DF1 Driver
- Set up the Station number of the DL3500 and the Baud Rate, Error Checking, etc.
Click OK
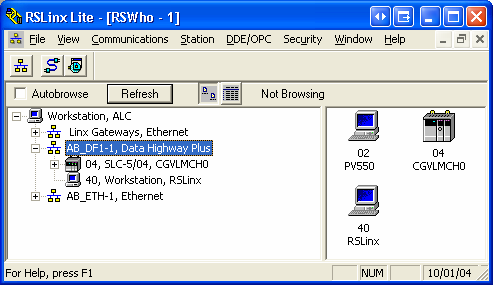
- If installation and settings are correct and a RSwho is done in RSlinx you will be
able to see both the SLC and PV as the Workstation. (Second picture view)
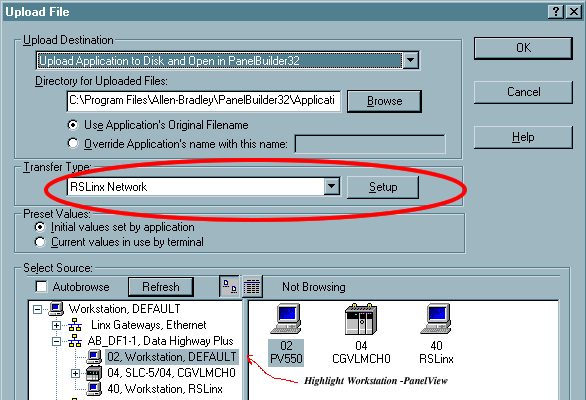
F. Download/Upload to PV
- Once the above steps have been completed you can now either upload or download an
application.
- To download, goto your application in Panelbuilder and select download under "File". If
the application validates with no errors a window (see below) will appear. Under
"Transfer Type" select RSLinx Network, highlight Panelview then "OK". Your
application should begin to download.
- To upload, goto "File" in Panelbuilder and select upload. A similar window will appear
where you will again need to select RSLinx Network under "Transfer Type". There are
some other selections in this window you will need to consider so please read options
carefully. Once completed select "OK".