PDF Download
Accessing Allen Bradley DH+ PLC with EQ7000 using Ethernet IP Driver from Kepware KEPServerEX.
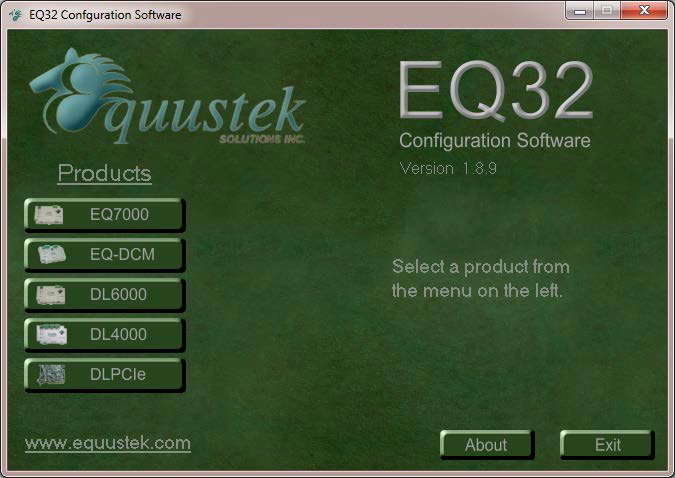
Start the EQ32 configuration Software.
Click on EQ7000.
Click on EQ7000.

From The COM Port Selection drop menu.
Select the COM port assigned to your USB
Connection to the EQ7000.
(Can be found under device manager)
Select the COM port assigned to your USB
Connection to the EQ7000.
(Can be found under device manager)
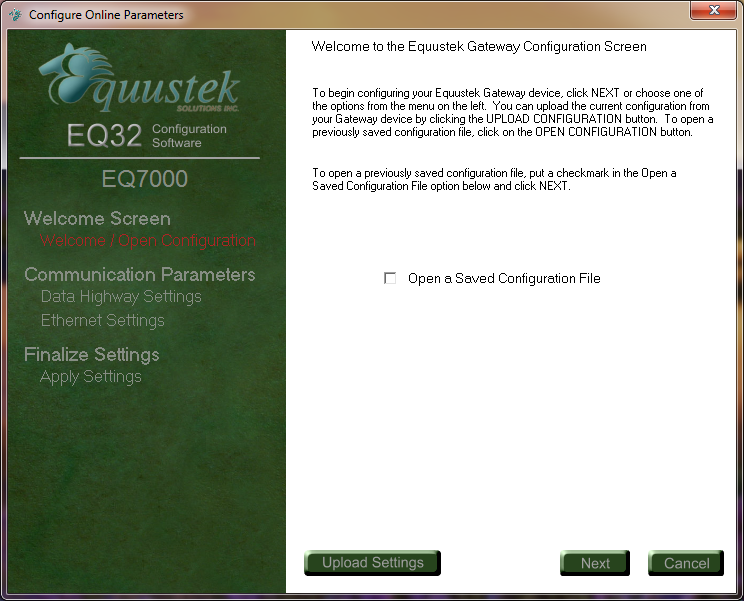
Click on Next.

Select the Network Type DH+ or DH485.
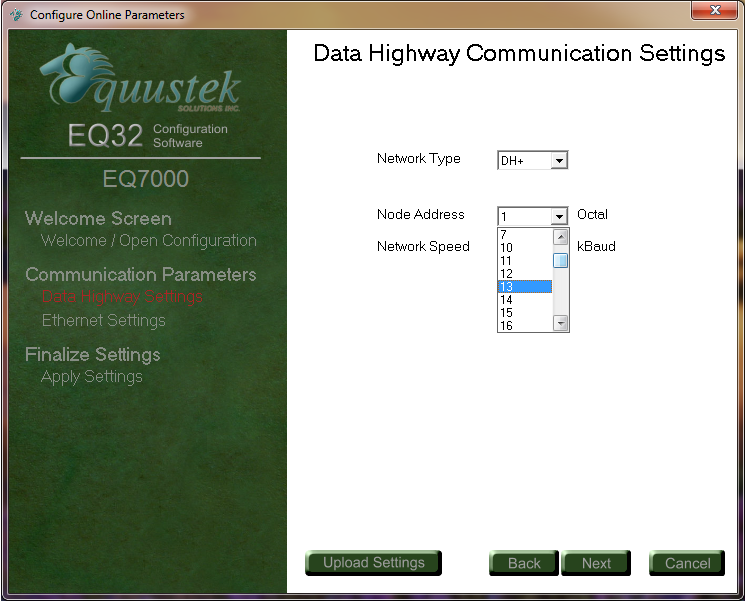
Select a node address number for the EQ7000 (please make sure this node does not exist on your DH+ Network).
This will be the node address number for the EQ7000 on the DH+ network in Octal.
This will be the node address number for the EQ7000 on the DH+ network in Octal.
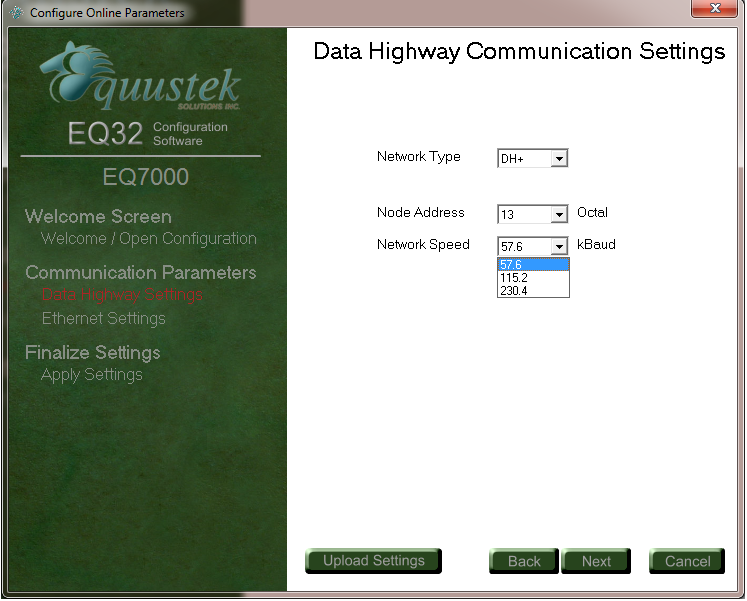
Select the DH+ Network Speed.
This is the DH+ Network Baud Rate.
This is the DH+ Network Baud Rate.
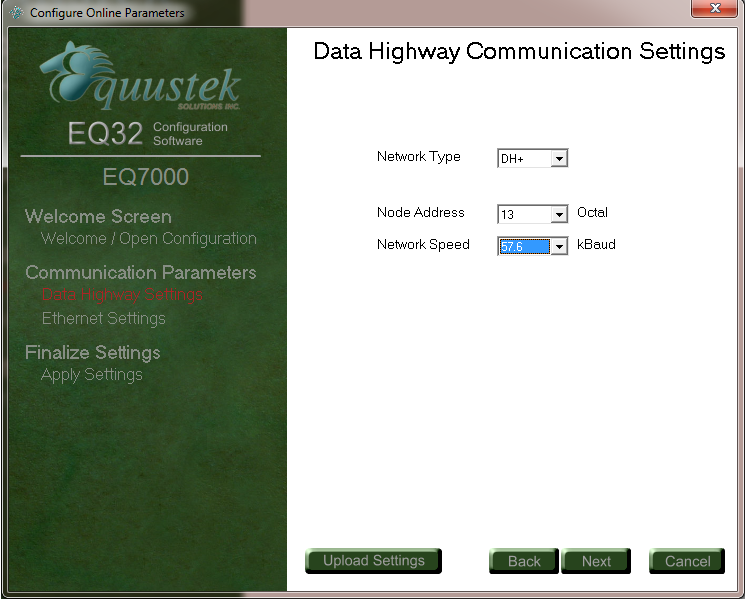
Click Next
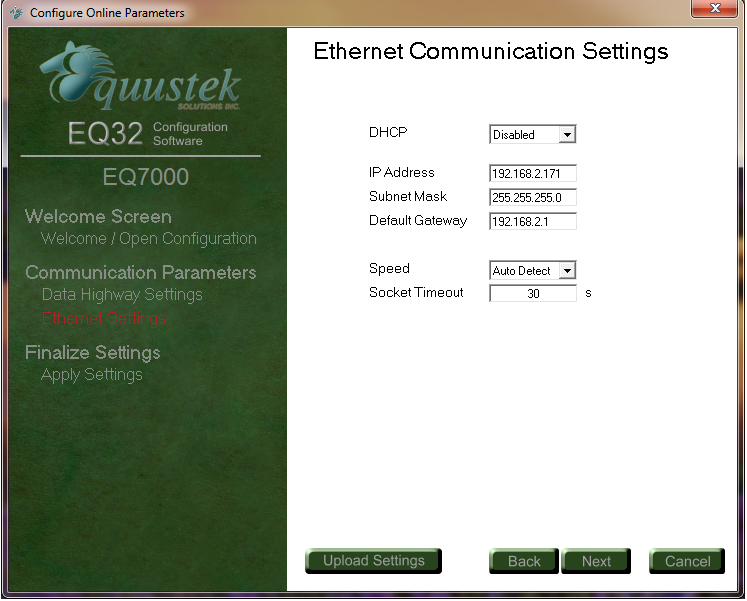
Enter EQ7000 IP address, Subnet Mask and Default Gateway if you have one, then click Next.

Select download configuration option then click Finish to download configuration to the EQ7000.
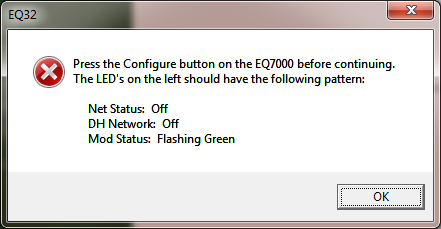
Press the configure pushbutton on the right hand side of the EQ7000 and then click Ok.

Now that configuration is complete, close the EQ32 configuration program, and press the Reset Pushbutton on the left hand side of the EQ7000.
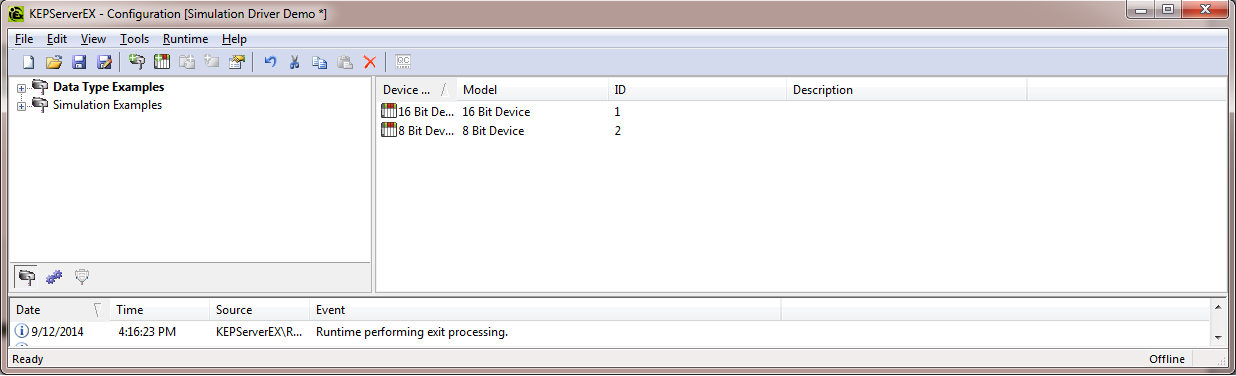
Start Kepware KEPServerEX.
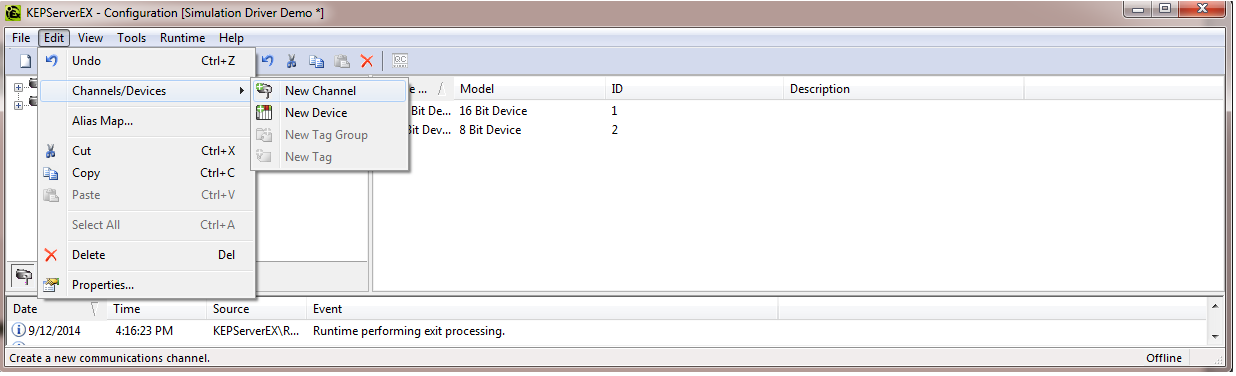
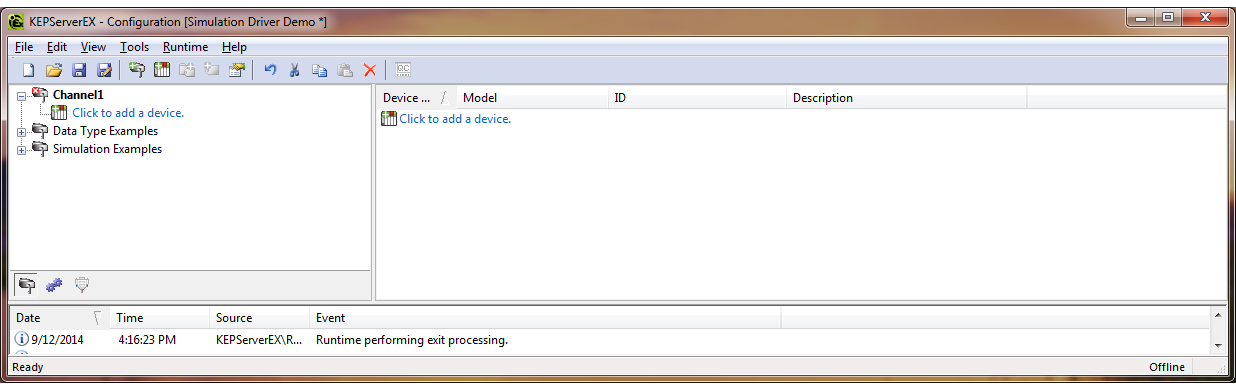
Under Edit Channels/Devices click on New Channel as shown.

Type a name for the Channel and click on Next.
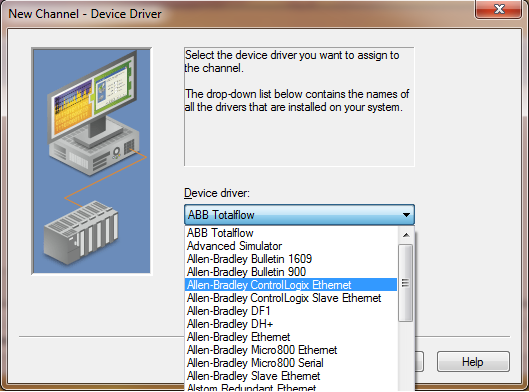
Click on the arrow to bring the Device driver selections, for Ethernet IP driver, select Allen Bradley Control Logix Ethernet as shown.
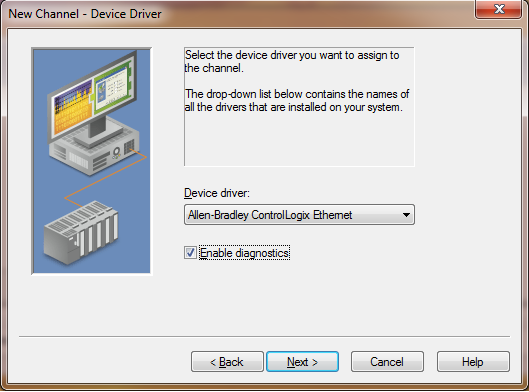
Click Next
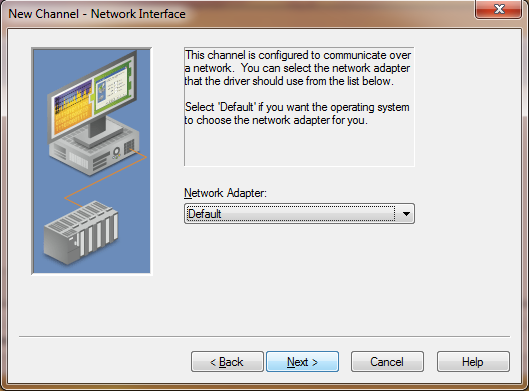
Select your network adapter, then click Next.
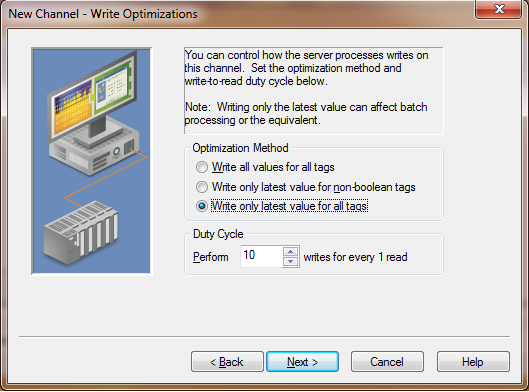
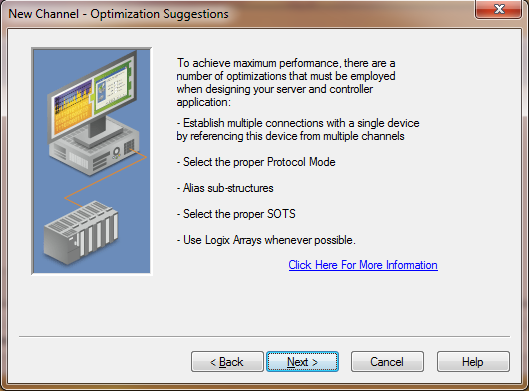
Select your optimization method, and click Next.
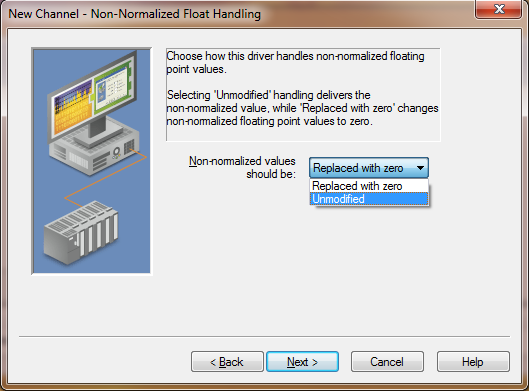
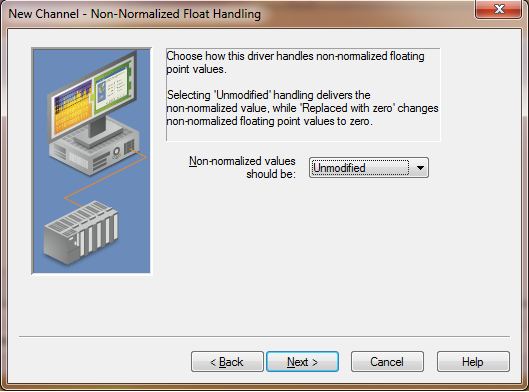
Select the way driver handles non-normalized floating point values.
Click Next.
Click Next.
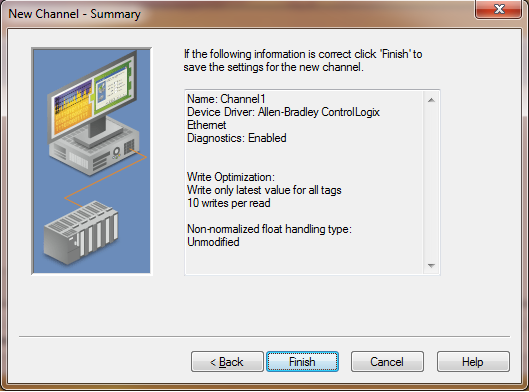
Once you see the setting are as you set them up click on Finish.
Back to the KEPServerEX windows click on (Click to add a device).
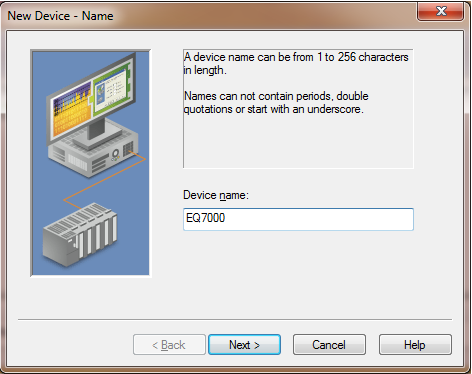
Type in a Device Name and click Next.
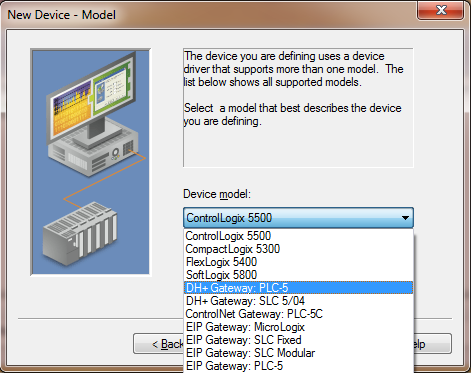
From the Device model drop menu, select the Device Model.

Click Next.
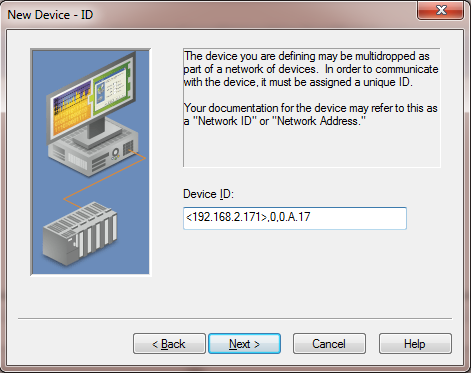
Enter the Device ID
IP or Hostname, would be IP address of the EQ7000
1, Always Replace with 0
Optional Routing Path, don�t enter anything.
DHRIO slot, would be always 0
DHRIO Channel, Always A
DH+ Node ID, would be the PLC5 or SLC 504 DH+ node address in Decimal, in this app note PLC5 node address is 21 Octal which is 17 Decimal
<192.168.2.171>,0,0.A.17
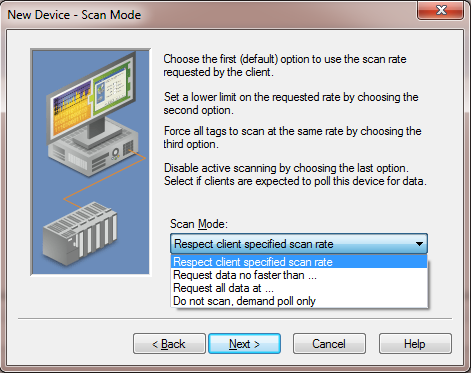
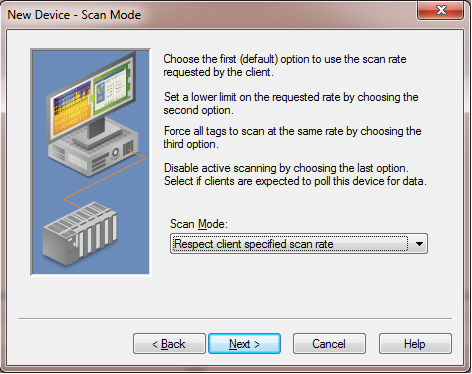
Select the Scan Mode.
Click Next
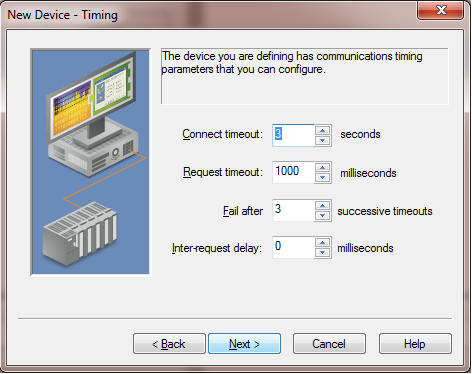
Enter timing parameters and click Next
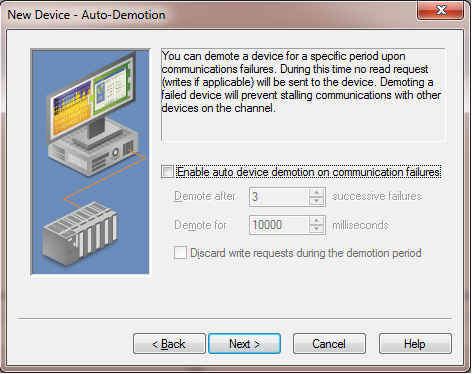
Enable Auto Device demotion upon communication failures, if not just click Next
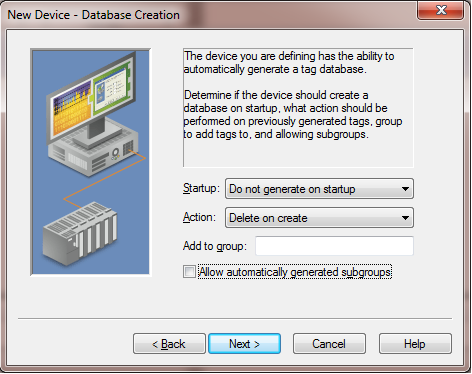
Choose database creation options then click Next.
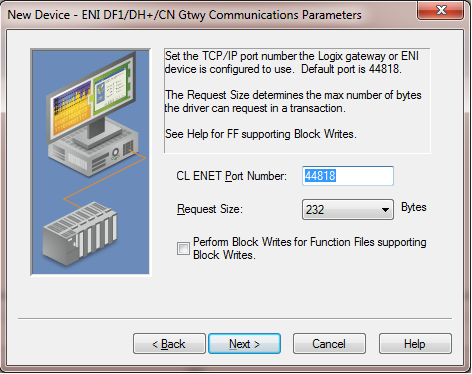
Enter Ethernet port 44818 for Ethernet IP, and the size of requested number of bytes and click Next.
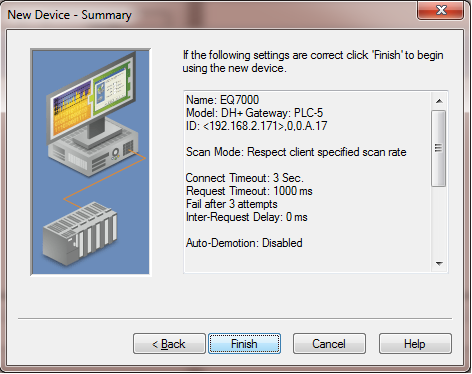
Make sure all settings match what you entered and click Finish.
Click on ( Click to add static tag).

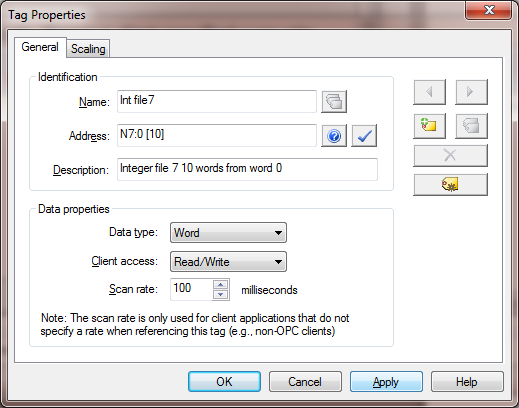
Enter tag ID, in this tag example we are requesting integer file 7, 10 words starting at word 0. Then click Apply.
Click Ok
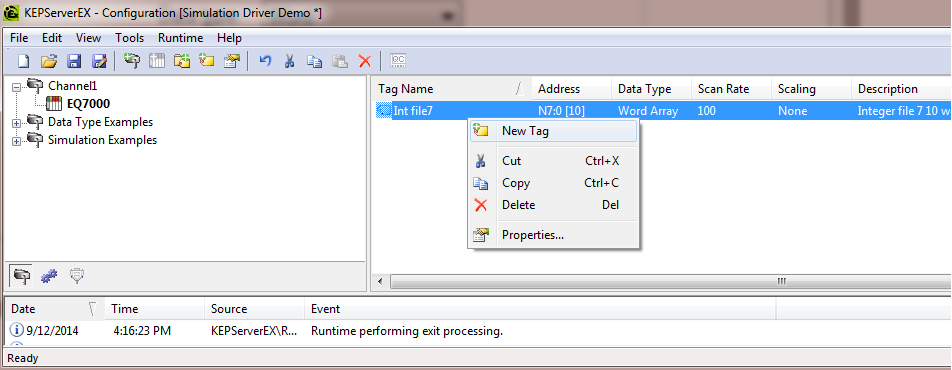
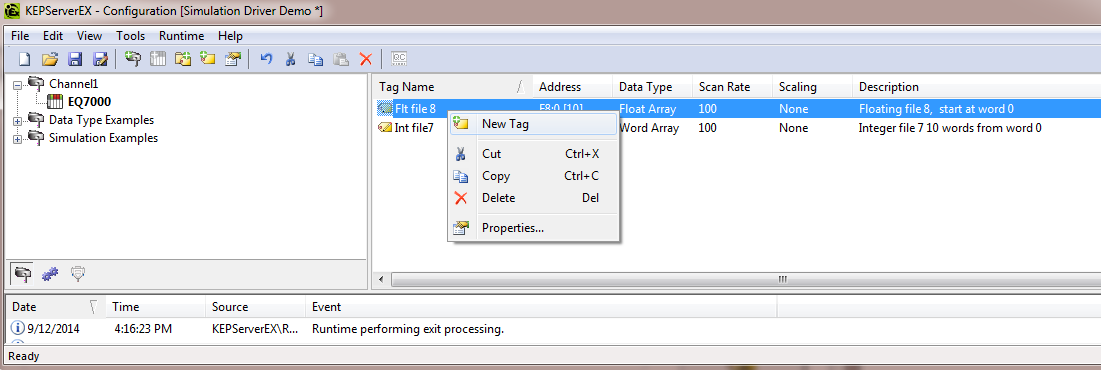
Right click on the previous tag to add a new tag as shown.
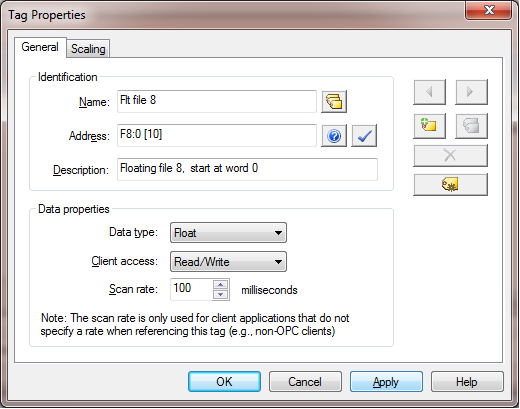
Enter tag ID in this tag example we are requesting Floating point file 8, 10 words starting at word 0. Then click Apply.
Click Ok
Repeat for another tag
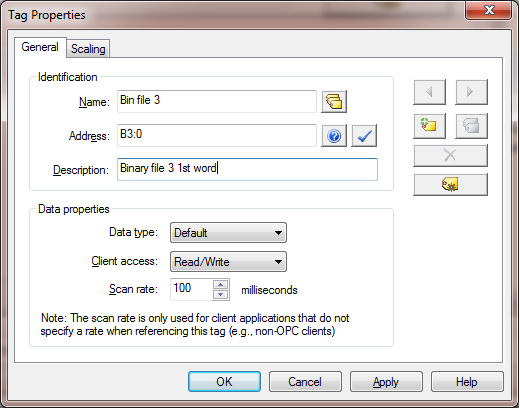
In this tag example we are requesting Binary file 3, 1 words starting at word 0. Then click Apply.
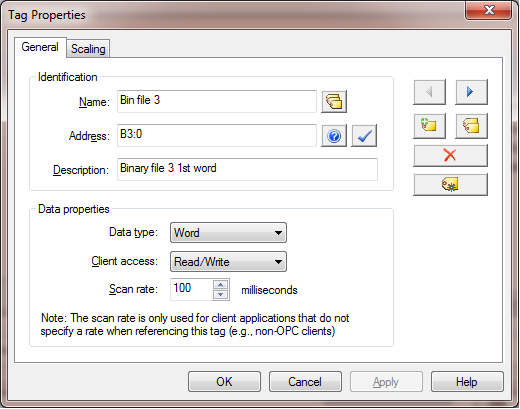
Click Ok
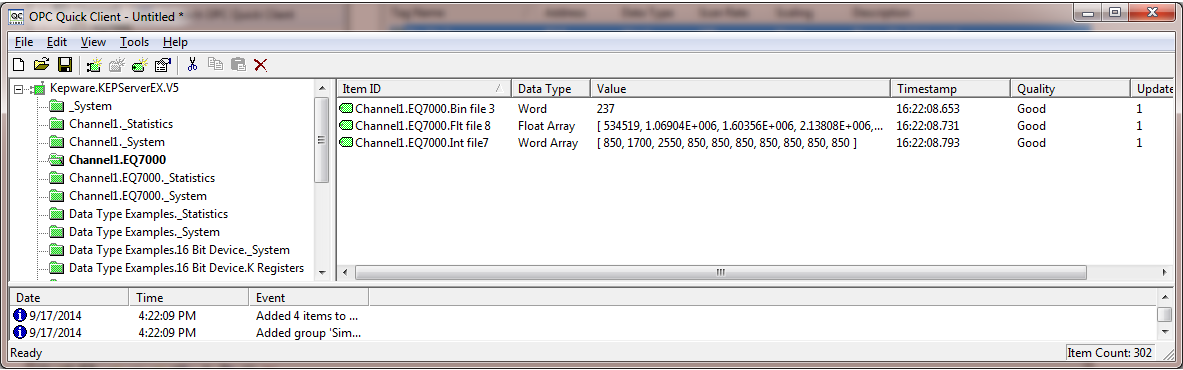
Under tools click on Lunch OPC Quick Client

Click on the Channel and device you created.
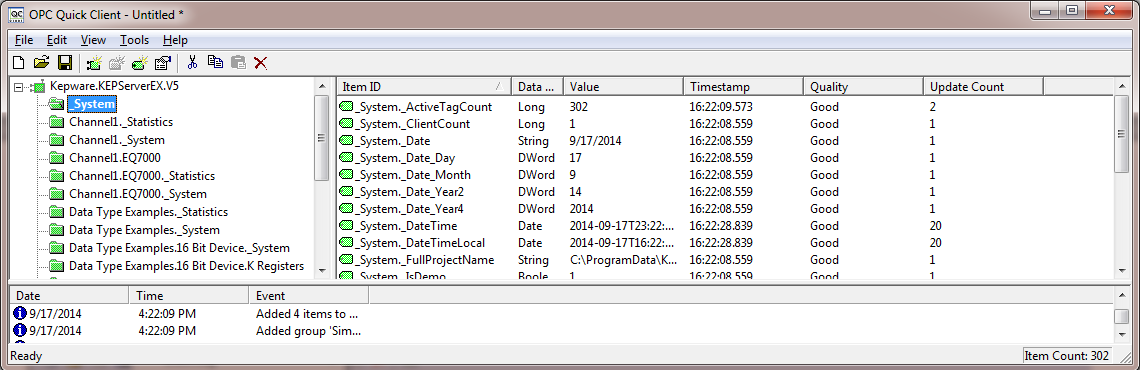
In this application note Channel1.EQ7000 then you can see all tags requested earlier as shown below.